Permaculture zoning isn’t about gardening; it’s a lean operating system for your farm designed to save you 10+ hours of labor per week.
- It redefines farm layout based on frequency of use and human movement, not just crop type.
- It turns natural forces like gravity, ecology, and solar patterns into a free, automated workforce.
Recommendation: Start by performing an energy audit of your property to identify the biggest sources of wasted time and movement.
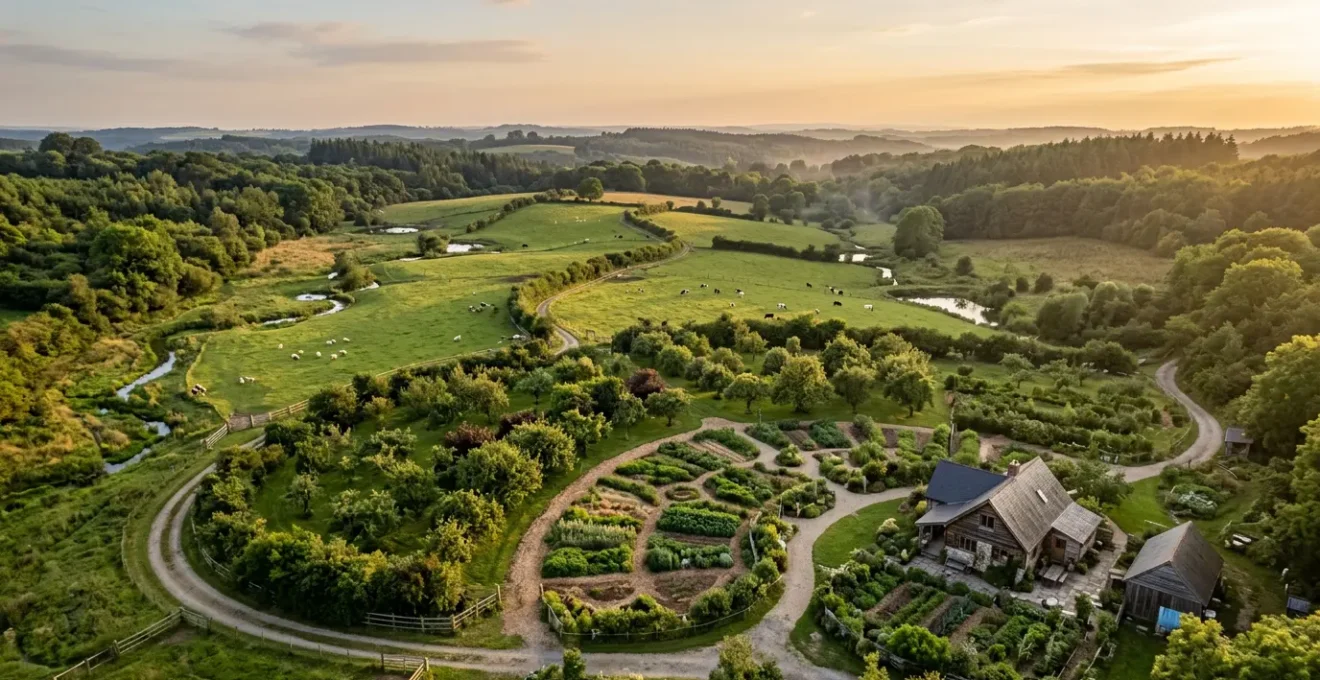
For the overworked smallholder, the day is a blur of motion. The to-do list is endless, and physical exhaustion is a constant companion. The common advice—work harder, invest in more equipment—often misses the point. The real thief of your time and energy isn’t the work itself, but the *waste* embedded in your workflow: the extra steps to the tool shed, the forgotten trips to the greenhouse, the battle against pests that could have been prevented. Many have seen the simple permaculture diagrams with neat, concentric circles, but dismiss them as an idealistic garden plan, not a serious strategy for a working farm.
But what if the solution wasn’t about adding more resources, but about ruthlessly eliminating waste? This is the core of Lean Farming, and its most powerful tool is a radical reinterpretation of permaculture zoning. We must stop seeing zones as a landscape map and start treating them as a time-management system. It’s a method to organize your entire operation around one critical question: what is the absolute minimum energy required to get this task done? This approach treats wasted steps, redundant tasks, and inefficient layouts as the primary pests to be eliminated from your farm.
This article will guide you through this paradigm shift. We will first break down the fundamental logic of each permaculture zone, not by what grows there, but by the time-saving principles they embody. Then, we will explore advanced applications of this efficiency-first mindset, showing how to optimize harvest logistics, design low-labor planting guilds, and even translate your saved time into a more viable and resilient business model. Prepare to look at your land not just as a place to grow food, but as a system to be engineered for maximum efficiency and productivity.
To help you navigate this comprehensive efficiency plan, the following article breaks down each critical component of the permaculture zoning strategy. This table of contents provides a roadmap for transforming your farm’s layout and your daily workflow.
Summary: A Strategic Guide to Farm Efficiency Through Zoning
- Why High-Maintenance Crops Must Be Visible from Your Kitchen Window?
- How to Map Your Daily Routes to Eliminate Wasted Steps?
- Centralized vs Decentralized Tools: Which Zoning Strategy Saves Time?
- The Compost Bin Mistake: Placing It Uphill from the Garden
- Wild Zones: How to Manage the ‘Do Nothing’ Zone for Pest Control?
- How to Calculate Share Prices for a Viable Community Supported Agriculture Scheme?
- Zoning by Harvest Time: How to Group Guilds for Easier Picking?
- How to Design Polyculture Guild Associations for Productive UK Forest Gardens?
Why High-Maintenance Crops Must Be Visible from Your Kitchen Window?
The first principle of Lean Farming is to make the things requiring the most frequent attention the most accessible. This is the essence of Zone 1, your farm’s high-frequency « control center. » It’s not just about proximity; it’s about observation and immediate intervention. Your kitchen window is the perfect observation post. A wilting salad green, a pest on a tomato plant, or a seedling tray drying out should be something you notice incidentally while making coffee. Placing these elements out of sight turns a 30-second observation into a 10-minute dedicated « checking » trip—a monumental waste of time and energy when repeated daily.
This zone is reserved for elements that require daily interaction: harvesting, watering, feeding, and monitoring. The goal is to integrate these chores seamlessly into your daily life. Think of salad greens and culinary herbs for tonight’s dinner, tender fruits like strawberries that need protection from birds, or small-scale systems like worm farms. The efficiency gain is staggering; one analysis revealed that proper Zone 1 placement can lead to a 50% reduction in harvesting time for frequently picked crops. This isn’t just about convenience; it’s a strategic reduction of your daily labor burden, freeing up hours every week.
To implement this, start by listing every task you do daily. These define your Zone 1 elements. A practical list includes:
- Salad greens and culinary herbs requiring daily harvest
- Tomatoes and soft fruits like strawberries needing regular monitoring
- Small livestock systems such as rabbit hutches or worm farms requiring daily feeding
- Seedling tables that require watering every 24 hours
- Kitchen compost bins for daily organic waste collection
By grouping these high-maintenance tasks right outside your door, you transform chores into incidental actions. You stop « going to the farm » and start living within a productive system where every glance out the window is a form of management.
How to Map Your Daily Routes to Eliminate Wasted Steps?
If your farm were a factory floor, any manager would conduct a time-and-motion study to optimize the layout. Your farm deserves the same analytical rigor. Wasted steps are a form of inventory—wasted time and energy that you can never get back. The first step to eliminating them is to make them visible. This is achieved by creating a « spaghetti diagram » of your daily movements. For one week, trace your every path on a map of your property: from the house to the chicken coop, from the coop to the compost, from the compost to the garden, back to the house. The resulting tangle of lines will reveal your most-traveled routes and your most inefficient detours.
This visualization is often shocking, revealing redundant trips and illogical placements. It provides the data needed to redesign your farm’s « circulatory system »—its pathways. The goal is to straighten these lines, connecting frequently-used elements in a logical sequence. Instead of concentric circles, efficient design might look different. The « Triangular Zoning Method, » for instance, directly connects the home (Zone 0) to all other zones, a concept that maximizes efficiency by minimizing transport distance between all elements, unlike traditional layouts.

This diagram illustrates the problem perfectly. Each colored line is a trip, and the tangled mess in the center represents a massive inefficiency. A well-designed farm layout aims to untangle these threads into a clean, direct flow. This isn’t about paving perfect sidewalks; it’s about placing elements in an order that reflects your actual workflow. The tool shed should be on the way to the main crop fields, not in the opposite direction. The processing area should be next to the harvest area, not back by the house. Every step saved is a victory in the war against wasted labor.
Centralized vs Decentralized Tools: Which Zoning Strategy Saves Time?
A common source of wasted time is the « tool-trip »—the long walk back to the main shed for a forgotten trowel or a pair of pruners. While a single, centralized tool shed seems organized, in a lean context, it’s often a bottleneck. The solution is to think of tools not as a single collection, but as decentralized kits strategically placed where they are needed most. This means creating small, zone-specific tool caches.
This strategy requires a small investment in duplicate tools, but the return on investment (ROI) in saved time is immense. Before dismissing the cost, perform a quick calculation: (Time Saved per Trip × Your Labor Cost per Hour × Trips per Season). This number is often far greater than the cost of a few extra hand tools. A study of permaculture farms confirmed that embracing these types of systematic designs has significant positive effects on labor productivity. It’s about investing in a system, not just an object. Your Zone 1 cache, perhaps a simple weatherproof box by the kitchen door, should contain daily-use items: a trowel, shears, and a harvest basket. The Zone 2 orchard cache would hold pruners and grafting supplies. The Zone 3 field cache might contain broader cultivation tools and row cover materials.
The principle extends to consumables. Establish small « resupply stations » in outer zones with bags of your preferred organic fertilizer, spare stakes, or twine. The goal is to have everything you need to complete a task *at the location of the task*. This eliminates the decision fatigue of « should I walk all the way back for that? » and prevents the compromise of « I’ll just make do without it, » which often leads to subpar work. A well-designed system makes the right way the easiest way.
The Compost Bin Mistake: Placing It Uphill from the Garden
One of the most common and costly design mistakes is ignoring the free energy provided by gravity. Placing a heavy compost pile downhill from the garden and uphill from the kitchen creates a pointless energy circuit: you haul heavy kitchen scraps uphill, and then haul heavy finished compost back downhill. This is a classic example of working against nature rather than with it. The core principle of efficient energy planning is to place elements to leverage natural flows: sun, wind, water, and gravity.
The correct placement for a compost system is uphill from the areas that will receive its nutrients. This allows you to use gravity as a free transportation service. Nutrient-rich leachate (compost tea) can be passively directed via a simple pipe or swale to fertilize downhill beds. Moving the finished compost becomes a downhill-only task, drastically reducing the physical energy required. This « energy auditing » approach applies to everything. Water tanks should be placed at the highest feasible point to create gravity-fed pressure. Material processing areas (like for chipping wood) should be on slopes to allow materials to flow down from one station to the next. You are looking for opportunities to let the landscape do the work for you.

To systematize this, you must conduct an energy audit of your property. This is not as complicated as it sounds and is arguably the most critical step in designing an efficient farm. It involves creating a multi-layered map to understand the invisible forces at play on your land.
Your 5-Step Energy Zoning Audit
- Layer 1 – Sun Map: Create an overlay showing the sun’s path across your property. Identify areas of full sun, partial shade, and deep shade throughout the day and seasons. This dictates where sun-loving crops go.
- Layer 2 – Wind Map: Document prevailing wind directions. Identify sheltered zones (for delicate crops) and exposed zones (for wind turbines or windbreaks).
- Layer 3 – Water Flow Map: Map the topographical contours. Observe where water accumulates after rain and identify natural drainage patterns. This is key for siting ponds, swales, and irrigation.
- Integration Step: Physically or digitally overlay these three maps. The intersections reveal the « sweet spots » and the problem areas, guiding optimal placement of all elements.
- Gravity Leverage: With your contour map, specifically identify slopes. Position compost, water storage, and material processing to enable passive, gravity-fed movement of water and materials downhill.
Wild Zones: How to Manage the ‘Do Nothing’ Zone for Pest Control?
Every property needs a Zone 5…. Whether it’s a corner of an urban lot dedicated to a wildlife thicket and a few rustling birch trees, or a nature preserve on the back forty, it is where we are visitors, not managers. We design the other four zones, but we enter Zone 5 to learn from it.
– Bill Mollison, Permaculture design principles
Zone 5 is the most misunderstood and undervalued area in permaculture design. Often described as the « do nothing » zone, it’s mistakenly seen as passive or useless. From a Lean Farming perspective, this is a grave error. Zone 5 is not a void; it is an engine. It is your on-site research and development department for ecological resilience and your primary source for a free, self-replicating pest control workforce.
The key is to reframe « do nothing » as « interfere as little as possible. » This zone serves as a natural reservoir of biodiversity. It provides habitat for predatory insects, pollinators, pest-eating birds, and other beneficial wildlife. A farm without a healthy Zone 5 is an island in a sterile landscape, forced to import or manually replicate the ecological services that this zone provides for free. The « management » of Zone 5 is about strategic non-management and creating connections.
Case Study: Beneficial Corridors
The true power of Zone 5 is unlocked when it is connected to your production zones. Modern permaculture design incorporates « beneficial corridors » like hedgerows, beetle banks, and wildflower strips. These act as highways, allowing beneficial organisms like ladybugs, lacewings, and parasitic wasps to travel from their Zone 5 habitat directly into your Zone 1-3 production areas. This creates a system of self-regulating pest control, drastically reducing the need for manual intervention or expensive sprays. By designing these corridors, you are actively inviting your free pest control team to work exactly where you need them most.
Your role is to foster this wild engine. Protect existing native vegetation. Allow a corner of your property to re-wild. Plant native hedgerows that connect your « wild » area to your cultivated fields. Then, as Mollison advised, enter this zone to observe. What native plants are thriving? What insects are present? Nature is constantly running experiments, and Zone 5 is where you get to see the results and apply those lessons to the rest of your farm.
How to Calculate Share Prices for a Viable Community Supported Agriculture Scheme?
You have systematically analyzed your farm, mapped your energy flows, and optimized your layout. The result is a significant « efficiency dividend »—saved time. With smart permaculture design, a saving of 10 hours saved weekly is a realistic goal for a small operation. The question now becomes: what do you do with this dividend? You can enjoy more rest, or you can translate that saved labor into a more accessible and resilient business model, like a Community Supported Agriculture (CSA) scheme.
A common hurdle for CSAs is the high upfront cost for members. However, your efficiency dividend allows you to be creative. By accurately calculating your labor costs, you can offer members the option to pay for their share with either money or their own labor. This makes your CSA accessible to a wider range of community members and builds a deeper connection to your farm. The key is a transparent conversion rate. For example, if your baseline farm labor cost is calculated at $20/hour, you can offer a $20 discount on a share for every hour a member contributes to weeding or harvesting.
To make this work without creating chaos, you must design for it. This means creating a specific, « fool-proof » Pick-Your-Own (PYO) zone that functions as an accessible sub-Zone 2. This area should feature easy-to-harvest, resilient crops where member « mistakes » won’t damage your primary production. By tracking the hours saved through your overall zone efficiency, you can calculate the reduced cost basis for each share, making your prices more competitive while maintaining profitability. This transforms your farm’s efficiency from a personal benefit into a community-building tool, creating a truly sustainable and supported agricultural system.
Zoning by Harvest Time: How to Group Guilds for Easier Picking?
Beyond spatial zoning, a powerful lean strategy is temporal zoning—organizing your farm by time. This means grouping crops not just by their ecological needs (guilds), but by their harvest and maintenance schedules. The goal is to create « single-pulse » workflows, where you can move through a block and perform all necessary tasks—harvesting, clearing, amending, and replanting—in one efficient cycle. This minimizes travel time and setup costs associated with switching between different types of tasks.
This approach has a profound impact on layout. For crops requiring frequent harvesting, beds should be designed for maximum ergonomic efficiency. Keyhole beds provide 360-degree access without stepping on and compacting the soil. For crops that require bending over, waist-high raised beds can eliminate back strain and dramatically increase the speed and comfort of harvesting. Even bed width becomes a crucial design parameter; it should be designed to exactly match the width of your wheelbarrow or harvest cart, eliminating awkward maneuvering and wasted movements.
Case Study: Seasonal Zone Fluidity
An organic herb farm in Belgium provides an excellent example of adaptive temporal zoning. During the peak growing season, their intensive cultivation beds are managed as a high-frequency Zone 1, requiring daily attention for harvesting and pest monitoring. However, once the main harvest is over and winter approaches, these same beds are reclassified. Their maintenance requirement drops to weekly checks, effectively shifting them to a Zone 2 or even Zone 3 status. This fluid, adaptive approach to zoning ensures that labor is always allocated to where it is most needed, optimizing workflow across the entire annual cycle rather than being locked into a static, inefficient map.
This dynamic view of zoning is critical. Your farm is a living system, and its needs change with the seasons. An efficient design is not a fixed blueprint but a flexible framework that adapts to the temporal pulses of planting, growing, and harvesting.
Key takeaways
- Farm zoning is a time-management system, not just a landscape plan; every design choice should be judged by its impact on labor.
- Leverage natural forces like gravity, sun, and water flow as a free workforce by conducting a thorough energy audit of your site.
- The « wild » Zone 5 is an active engine for free pest control; design corridors to connect it to your production zones.
How to Design Polyculture Guild Associations for Productive UK Forest Gardens?
The ultimate expression of a « lean » farm system is one that largely manages itself. This is the promise of well-designed polyculture guilds, particularly in a forest garden context. While the title specifies UK gardens, the principles of stacking functions into low-labor associations are universal. A guild is a mutually beneficial grouping of plants, and a « low-labor » guild is one specifically designed to minimize the need for human intervention: weeding, watering, fertilizing, and pest control.
The design process involves selecting plants to fulfill the seven key layers of a forest garden, but with an explicit focus on reducing maintenance. For the canopy layer, you might choose a nut tree like a walnut, which requires minimal pruning, over a fruit tree that needs constant attention. For the understory, gooseberries are less labor-intensive than raspberries, which require annual pruning and containment. The herbaceous layer can be filled with dynamic accumulators like comfrey or rhubarb, which « mine » nutrients from the subsoil and make them available to other plants, reducing your fertilization workload. A ground cover of strawberries or clover can suppress weeds, minimizing or eliminating the need for mulching or hoeing.

Each element is chosen for its ability to perform a job that you would otherwise have to do. The system, once established, creates its own fertility, manages its own water, and hosts a population of beneficial insects that control pests. This is the pinnacle of efficiency: a productive, resilient ecosystem that yields food, fiber, and medicine while demanding a fraction of the labor required by a conventional monoculture system. It represents the final step in the journey from an overworked farmer to a skilled ecosystem conductor.
Your journey to a more efficient and profitable farm doesn’t start with a new piece of equipment, but with a new perspective. Begin today by mapping your daily pathways and identifying a single wasted motion to eliminate. This is the first step towards reclaiming your time and building a farm that works for you, not the other way around.