Designing productive polycultures is less about what you plant, and more about how you choreograph the dynamic relationships between them in time and space.
- True resilience comes from managing dynamic functions (like fertility and succession), not just filling static layers with plants.
- Strategic spacing, rootstock selection, and access planning are non-negotiable; they dictate the long-term success or failure of a guild.
Recommendation: Shift your focus from creating a static plant list to designing an evolving, multi-functional ecosystem that you actively manage.
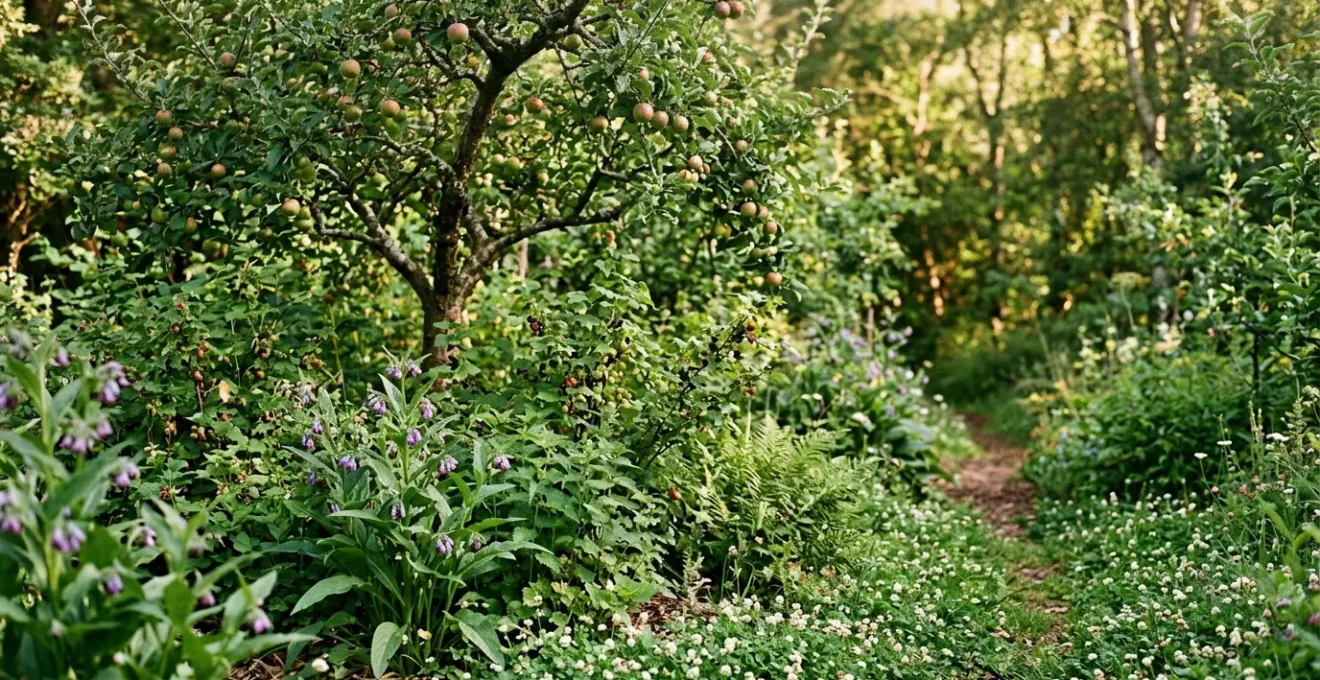
Many permaculture enthusiasts embarking on a forest garden project begin with the familiar concept of companion planting, pairing a few beneficial plants together. Yet, to create a truly self-sustaining and productive edible landscape, one must evolve from simple pairings to designing complex guild associations. A guild is not a static collection of plants; it is a living, interacting community—an ecosystem in miniature. The common approach often involves a « shopping list » method, ticking off the seven layers of a forest garden. This can lead to a chaotic tangle that underperforms.
The real art of agroforestry design lies in moving beyond the « what » and embracing the « how » and « why. » It’s a shift from being a plant collector to an ecosystem choreographer. This involves understanding the invisible connections: nutrient cycles, successional pathways, spatial dynamics, and temporal stacking of harvests. Instead of just asking « what plant goes in the shrub layer? », the master designer asks « what functions does this layer need to perform over the next ten years, and how can I stack multiple species to ensure that function is resilient? »
This guide delves into the core principles of this dynamic design process, tailored for the unique conditions of UK temperate climates. We will deconstruct common wisdom and provide a systems-thinking framework to help you design guilds that are not only productive and resilient but also manageable and beautiful. By mastering these concepts, you can actively steer your garden’s evolution, creating a landscape that yields abundantly with minimal external inputs.
To help you navigate these advanced concepts, this article is structured to answer specific, critical design questions. The following summary outlines the key areas we will explore to transform your approach to guild creation.
Summary: A Systems Approach to Polyculture Guild Design
- Why You Need All 7 Layers for a Self-Sustaining Guild?
- How to Pair Nitrogen Fixers with Fruit Trees for Natural Fertility?
- Planting All at Once vs Succession Planting: Which Guild Strategy Works Best?
- The Spacing Mistake That Turns a Guild into a Tangled Mess
- Zoning by Harvest Time: How to Group Guilds for Easier Picking?
- Dual Purpose: How to Select Trees That Provide Fodder and Fruit?
- Row Planting vs Polyculture: Which Mimics Forest Resilience Better?
- Silvopasture Integration Methods: How to Introduce Trees into Sheep Systems Profitably?
Why You Need All 7 Layers for a Self-Sustaining Guild?
The seven-layer forest garden model—tall trees, low trees, shrubs, herbaceous perennials, ground covers, rhizomes, and vertical climbers—is often presented as a rigid recipe for success. The underlying principle is sound: by occupying every available niche, both above and below ground, the system maximizes photosynthesis, conserves water, and builds soil. A fully-realized, multi-layered system creates a resilient ecosystem that requires little or no extra energy input once established. It develops its own microclimate, nurtures a complex soil food web, and provides habitats for beneficial insects and predators, reducing pest pressure.
However, the question isn’t whether seven layers are *ideal*, but whether they are always *necessary*. The goal of a designer is not to dogmatically fill layers, but to ensure all critical ecological functions—such as nutrient cycling, ground cover, and pollination—are being met. In smaller, urban, or developing gardens, a « Functional Minimum Guild » can be far more effective. This approach prioritizes function over form, achieving a productive polyculture with fewer layers, demonstrating that the principles of ecological design are flexible and scalable.
Case Study: The ‘Functional Minimum’ at Paradise Lot
On their tiny 1/10-acre urban plot, permaculturists Eric Toensmeier and Jonathan Bates proved that a highly productive system can thrive without all seven layers. As documented in their work, they intentionally omitted the tallest overstory layer, using fruit trees as their main canopy. By focusing on ensuring all essential ecological functions were met by the remaining layers, they created a successful, dense, and productive polyculture. This practical example from Paradise Lot shows that a deep understanding of function allows for creative adaptation of the seven-layer model to fit any site’s constraints.
Ultimately, the seven layers are a powerful conceptual tool, a template for ecological completeness. A mature system with all layers is the pinnacle of resilience. But for the practical designer, the immediate goal is to establish a functional, thriving polyculture, even if it begins with only three or four layers that serve the most critical functions for the site.
How to Pair Nitrogen Fixers with Fruit Trees for Natural Fertility?
One of the most powerful relationships in a forest garden guild is the partnership between a heavy-feeding plant, like a fruit tree, and its nitrogen-fixing companions. Nitrogen is a mobile nutrient, essential for leafy growth, and often the limiting factor in plant productivity. Nitrogen-fixing plants, through a symbiotic relationship with rhizobia bacteria in their root nodules, pull atmospheric nitrogen gas and convert it into a plant-available form. This creates a closed-loop fertility system, drastically reducing the need for external fertilisers.
The design question is not just *whether* to include them, but *how many* and *how to manage them*. Permaculture pioneer Martin Crawford’s research offers a clear guideline:
at least 25% of your plants in an orchard or food forest should be n-fixing plants
– Martin Crawford, Nitrogen-fixing plants research, as cited by Tenth Acre Farm
This 25% rule provides a robust starting point. These fixers can be trees (like Alder or Black Locust), shrubs (like Elaeagnus or Goumi), or herbaceous plants (like clovers and vetches). The key to unlocking their benefit is active management through a technique known as « chop-and-drop. » By cutting the leafy biomass of these plants and letting it decompose as mulch at the base of the fruit tree, you release the stored nitrogen directly into the root zone where it’s needed most. This mimics the natural process of leaf fall in a forest, building rich, living soil over time.
This image demonstrates the intimate connection between the designer’s hand and the soil-building process through the chop-and-drop technique.
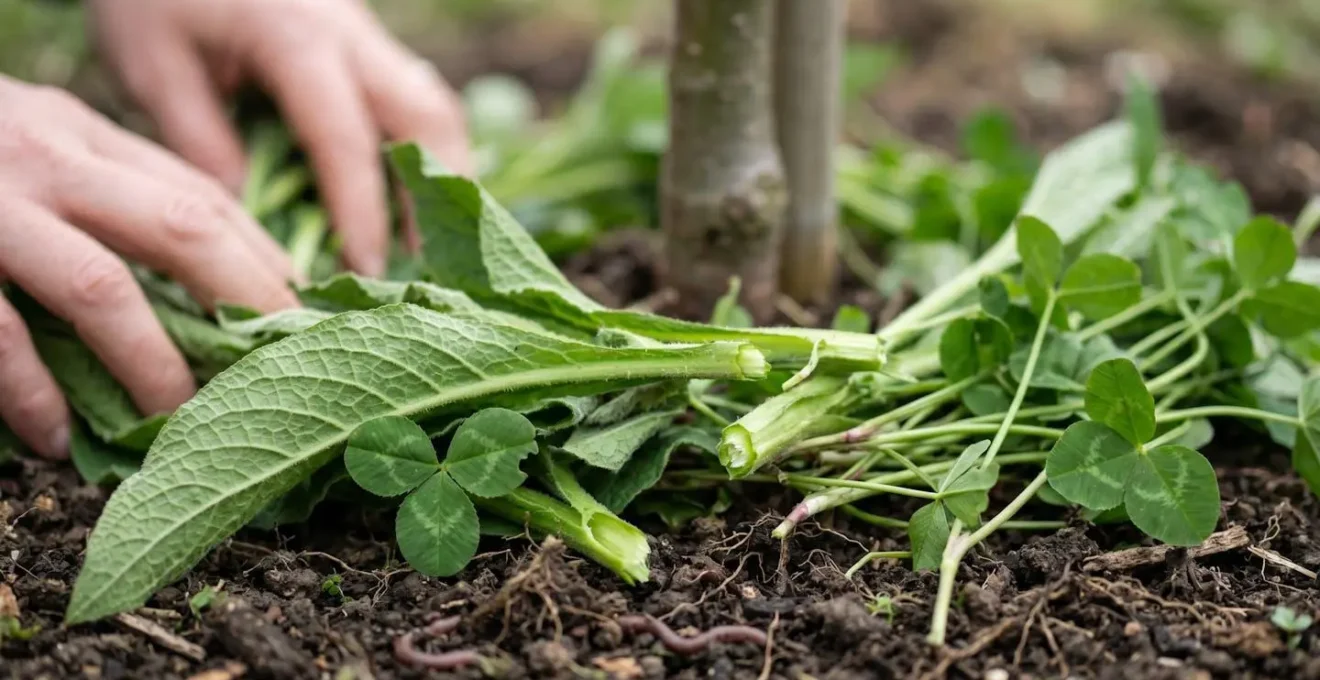
As you can see, this isn’t passive gardening; it is an act of ecological choreography. The timing of the « chop » is also critical—it’s often done just before the nitrogen-fixing plant flowers, when the nitrogen content in its leaves is at its peak. This transforms a simple plant into an active fertility pump for your entire guild.
Planting All at Once vs Succession Planting: Which Guild Strategy Works Best?
A common dilemma for the guild designer is one of timing: do you plant the entire, final-form guild at once, or do you phase it in over time? Planting everything together seems efficient, but it often ignores the fundamental ecological process of succession. In nature, ecosystems evolve from hardy, fast-growing pioneer species to a stable, diverse climax community. Ignoring this can lead to slow-growing climax species being outcompeted by vigorous pioneers planted at the same time.
The alternative is to work with this process through a strategy of « managed succession. » This involves actively using pioneer species to prepare the ground for the desired climax species. It’s a way of compressing a natural timeline that could take decades into just a few years. This approach is central to advanced permaculture design, turning a passive wait into an active, productive phase of establishment.
Case Study: Accelerating Succession with ‘Nurse Trees’
The principle of ‘Accelerating Succession and Evolution’ is demonstrated by using fast-growing, nitrogen-fixing pioneer trees like Red Alder or Birch as ‘nurse trees’. These are planted to rapidly improve soil fertility, provide a windbreak, and create a favourable microclimate. As detailed in permaculture design strategy, these nurse trees shelter the slower-growing, high-value climax species like Walnut or Oak. Once the climax trees are established and ready to dominate, the nurse trees are coppiced or removed, having fulfilled their successional role. This strategic intervention mimics a decades-long natural process in as little as 5-10 years.
While a 10-year observation period for forest garden establishment is a realistic timeframe for a system to reach maturity, managed succession can significantly accelerate the journey to productivity. The « plant all at once » strategy can work for herbaceous guilds or in very small spaces, but for larger systems involving trees and shrubs, embracing the role of a successional choreographer yields a far more resilient and ultimately successful forest garden.
The Spacing Mistake That Turns a Guild into a Tangled Mess
The single most common and difficult-to-reverse mistake in guild design is improper spacing. Enthusiasm in the early stages leads to planting things too close together, underestimating their mature size. Within a few years, what was intended as a harmonious polyculture becomes a « tangled mess »—an impenetrable thicket where plants compete for light and air, harvesting is impossible, and disease is rampant. The key to avoiding this is to design for the mature system from day one, and this starts with understanding your largest elements, typically the fruit trees.
The ultimate size of a fruit tree is determined not by the variety, but by its rootstock. A ‘Bramley’s Seedling’ apple tree can be a 1.5-meter-tall spindle on an M27 rootstock or a 6-meter giant on an M25. This choice dictates the entire geometry of your guild. A vigorous rootstock requires a guild footprint of over 30 square meters, while a dwarfing one can fit into just a few. You must know your rootstocks before you can even begin to lay out your design.
The following table, based on guidance from the Royal Horticultural Society, illustrates the dramatic difference in spacing required for various apple rootstocks. This data is the foundation of intelligent guild layout.
| Rootstock Type | Ultimate Height | Ultimate Spread | Spacing Between Trees | Best Use in Guild | Staking Requirement |
|---|---|---|---|---|---|
| M27 (extremely dwarfing) | 1.2-1.8m (4-6ft) | 1.5m (5ft) | 1.2-1.5m (4-5ft) | Small patios, intensive guilds | Permanently staked |
| MM106 (semi-dwarfing) | 3-4m (10-13ft) | 4m (13ft) | 3.6m (12ft) | Standard garden guilds | 5 years |
| M25 (very vigorous) | 4.5m+ (15ft+) | 6m (20ft) | 6-7m (20-23ft) | Parkland settings, community orchards | Not required when mature |
Beyond tree spacing, you must design for access. A guild you cannot enter to harvest, prune, or manage is a failed design. This is where a keyhole path becomes an essential design pattern. These narrow, winding paths allow you to penetrate the dense planting to reach the centre, maximising planting area while maintaining crucial accessibility.
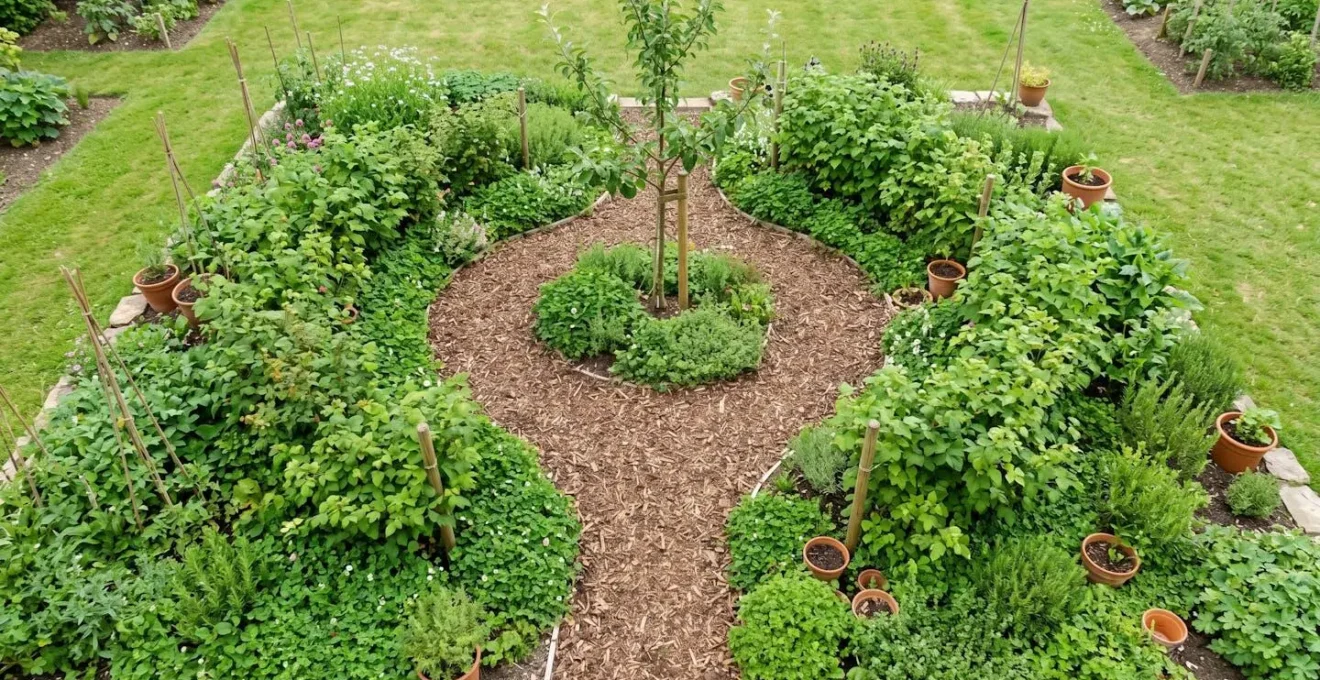
This aerial view shows how a simple path transforms a dense block of plants into a manageable and accessible system. It is a perfect example of a design pattern that balances productivity with practicality.
Your Guild Spacing and Access Audit
- Identify Central Elements: List the mature height and spread of every tree and large shrub in your design. Have you confirmed their rootstocks?
- Map Mature Footprints: On paper or on the ground, mark out the final diameter of each major plant. Do they overlap excessively?
- Define Access Corridors: Draw the paths needed for a wheelbarrow, for harvesting, and for pruning. Are all key plants reachable?
- Check Sun Exposure: Simulate the sun’s path at maturity. Will taller elements shade out sun-loving understory plants in a few years?
- Plan for Phased Removal: Identify temporary « filler » plants that occupy space now but will be removed as the main elements mature. Is their removal practical?
Zoning by Harvest Time: How to Group Guilds for Easier Picking?
A sophisticated layer of design, beyond physical space, is temporal stacking—the art of arranging plants not just by their physical layer but by their time of harvest. A common frustration in a sprawling food forest is the « scavenger hunt » harvest, where you wander the entire site to pick a handful of this and a sprig of that. By strategically grouping plants that are ready for harvest at the same time, you create zones of efficiency, making the process of gathering food intuitive and joyful.
This concept is particularly powerful when designing for specific harvest windows. In the UK, the « hungry gap » in early spring (April-May) is a period when winter stores are dwindling and summer crops have yet to begin. Designing a specific « Hungry Gap Guild » near the kitchen ensures a concentrated supply of fresh food exactly when it is most needed. This guild would group together early-fruiting shrubs, emerging perennial vegetables, and spring greens, creating a one-stop-shop for an early spring salad.
This is a practical application of the permaculture principle of zoning, but applied to time instead of just distance. Your « Zone 1 » for frequent access can have temporal sub-zones: an early spring corner, a summer berry patch, and an autumn nut-harvesting area. This level of design foresight transforms a garden from a simple collection of plants into a highly efficient, user-friendly food production system.
Design for a UK ‘Hungry Gap’ Guild (April-May Harvest)
- Understory Layer: Plant Honeyberry (Lonicera caerulea) as the central early-fruiting shrub, producing edible berries from late April.
- Herbaceous Layer: Establish dense patches of Wild Garlic (Allium ursinum) in the semi-shaded areas under the shrub for a continuous leaf harvest from March to May.
- Ground Cover & Rhizome Layer: Include edible Hostas, whose young shoots (‘hostons’) emerge in April and can be harvested as an asparagus-like vegetable.
- Additional Perennial Layer: Plant Ostrich Fern (Matteuccia struthiopteris) for its delectable ‘fiddleheads’, which are harvested for a very short window in early spring.
- Design Principle: Group these early-season producers together in a highly accessible zone, such as near a kitchen door, to maximize observation and ease of harvest during the UK’s notorious ‘Hungry Gap’.
Dual Purpose: How to Select Trees That Provide Fodder and Fruit?
In the spirit of efficient design, the ultimate goal is to « stack functions »—to have a single element perform multiple roles. When selecting trees, the most obvious function is fruit or nut production. But a more sophisticated design approach asks: what else can this tree do? Can it provide fodder for animals, nectar for bees, timber, or medicine? Choosing dual-purpose or even multi-purpose species is a hallmark of a truly integrated and resilient system. This thinking was central to the work of UK forest gardening pioneer Robert Hart, who designed his entire site with both therapeutic and nutritional goals in mind, weaving functions together.
A classic example is the selection of trees that provide both a human yield and animal fodder. This lays the groundwork for future silvopasture systems or simply supports backyard poultry. Tree fodders are often rich in minerals and proteins that can supplement pasture, and they provide shade and shelter, improving animal welfare. Species like Mulberry offer delicious fruit for humans while their leaves are an excellent, high-protein feed for rabbits and goats. Willows, while not yielding fruit, provide early-season pollen for bees and their branches can be coppiced for sheep fodder, basketry materials, and firewood.
This principle of function stacking was articulated perfectly by the co-founder of permaculture, Bill Mollison, when describing the multifaceted role of a single genus:
Acacias fulfill many functions: they provide seeds for poultry forage, foliage for larger stock, and fix nitrogen in the soil, while blossoms provide pollen for bees
– Bill Mollison, Introduction to Permaculture, as cited by Couch to Homestead
When you select a tree, you are making a decision that will influence your landscape for decades. By running each potential choice through a filter of multiple functions, you move beyond simple food production and begin to design a truly interconnected, abundant, and synergistic ecosystem.
Row Planting vs Polyculture: Which Mimics Forest Resilience Better?
The conventional agricultural model is based on monoculture row planting. This design prioritizes ease of mechanical management but is inherently brittle—it’s susceptible to pest outbreaks, requires high fossil fuel inputs, and degrades soil over time. The forest garden polyculture, in contrast, mimics the structure and resilience of a natural forest. Its diversity creates a stable system where pests are controlled by predators, and fertility is generated in a closed loop. As research demonstrates, polycultures often offer increased crop yields per area compared to monocultures, a phenomenon known as overyielding.
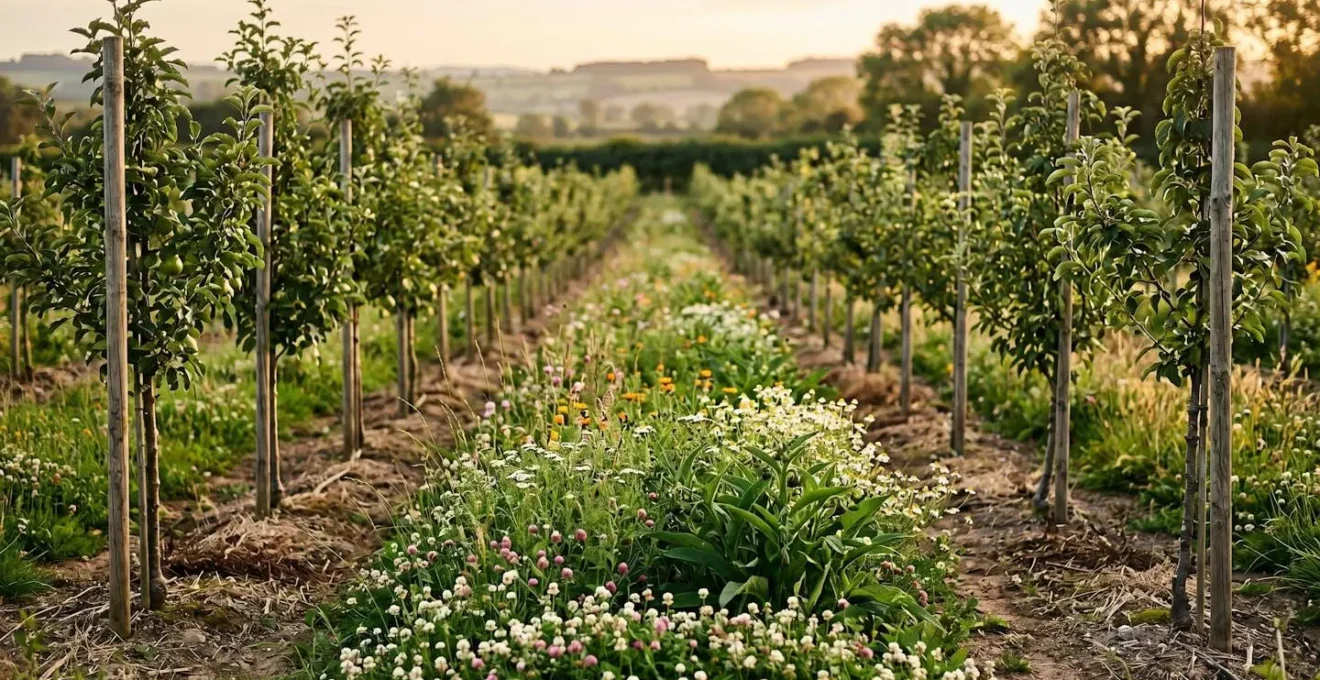
However, the debate isn’t a simple binary choice. For many agroforestry adopters, a pure, seemingly chaotic polyculture can be intimidating to manage and may not fit their production goals. This has led to the emergence of powerful hybrid models like alley cropping. This system combines the best of both worlds: the order and accessibility of row planting with the ecological benefits of polyculture. Trees are planted in organised rows, and the « alleys » between them are dedicated to diverse polyculture strips of nitrogen fixers, pollinator attractors, and other cash crops or pasture.
This hybrid approach is a perfect example of applying a « pattern language » to landscape design. It offers a practical and scalable transition from monoculture to a more resilient system.
Case Study: The ‘Miracle Farms’ Hybrid Model
Permaculture expert Stefan Sobkowiak famously converted a 4,000-tree apple monoculture in Quebec into a diverse and profitable permaculture orchard. Instead of a random polyculture, he implemented a systematic design, planting rows that alternated between fruit tree varieties and integrated one nitrogen-fixing tree for every two fruit trees. This structured polyculture eliminated the need for synthetic fertilisers and created a resilient ecosystem. His model demonstrates how ‘Enterprise Stacking’—layering multiple functions and yields in the same space—can be achieved within an organised, row-based framework, making ecological design viable at a commercial scale.
This image of an alley cropping system visually captures the elegant synthesis of structure and diversity, a key pattern for scaling up polyculture design.
The right choice depends on your context: for a small backyard, a dense, intricate polyculture is ideal. For a larger farm-scale operation, a structured pattern like alley cropping may provide the perfect balance of ecological resilience and operational efficiency.
Key Takeaways
- A guild’s success hinges on fulfilling ecological functions, not just filling the seven layers.
- Spacing based on mature rootstock size and planning for access paths are the most critical, irreversible design decisions.
- Managing the system through time—via accelerated succession and harvest zoning—is as important as managing it in physical space.
Silvopasture Integration Methods: How to Introduce Trees into Sheep Systems Profitably?
The final layer of ecological choreography is the integration of animals. Silvopasture—the intentional combination of trees, pasture, and livestock in a single system—is one of the most productive and regenerative forms of agriculture. It brings the guild concept to its ultimate conclusion, creating a system that yields fruit, nuts, timber, and meat from the same piece of land while sequestering carbon and dramatically increasing biodiversity. The inspiration for such intensely productive systems can be drawn from traditional models, as Robert Hart noted when observing the home gardens in Kerala, India that provide the majority of food for millions in a small area.
For UK farmers, particularly those with sheep, integrating trees into pasture can seem daunting. The primary challenge is simple: protecting young trees from the very animals they are meant to benefit. Sheep will browse, rub against, and destroy unprotected saplings. Therefore, the profitability and success of any silvopasture system rests entirely on a cost-effective and reliable tree protection strategy. The method chosen must balance initial cost, long-term durability, and maintenance requirements.
The options range from inexpensive individual tubes to more complex but permanent living hedges. The right choice depends on the scale of the planting, the value of the trees, and the management style of the farmer. A long-term view often favours solutions that, while more expensive initially, eventually become a permanent and even productive part of the landscape themselves, such as a thorny hedge that also yields berries.
Your Guide to Tree Protection in UK Sheep Silvopasture
- Individual Plastic Tubes (60-120cm): The most economical option (£2-5 per tree), best for large-scale plantings of hardy native species. They are effective for 3-4 years but must be removed to prevent constricting the tree.
- Tuley Tubes (1.2-1.8m): A taller, more robust design with ventilation (£8-15 per tree). They offer protection for 5-7 years and are better for faster-growing or more valuable trees.
- Electric Fence Outriggers: A reusable and psychologically effective method (£15-25 per tree) using wire circles powered by a solar energizer. Highly effective against sheep and deer but requires regular maintenance checks.
- Living ‘Nurse Hedges’: The ultimate integrated solution. Planting a dense circle of thorny shrubs like Hawthorn or Blackthorn (£20-30 per tree) creates a permanent, self-maintaining barrier that also provides additional habitat and yields. This requires a 2-3 year establishment period before introducing livestock.
Introducing trees into sheep systems is a powerful step towards a more profitable and resilient farm. Success is not a matter of chance, but of careful planning, with a robust tree protection strategy being the absolute first step in the design process.
By shifting your perspective from planting static objects to choreographing dynamic systems, you can unlock the true potential of your land. Begin today to design your landscape not as a collection of plants, but as an integrated, resilient, and productive ecosystem that will evolve and yield for decades to come.